How to copy non contiguous cell ranges
Table of Contents
1. How to copy non contiguous cell ranges
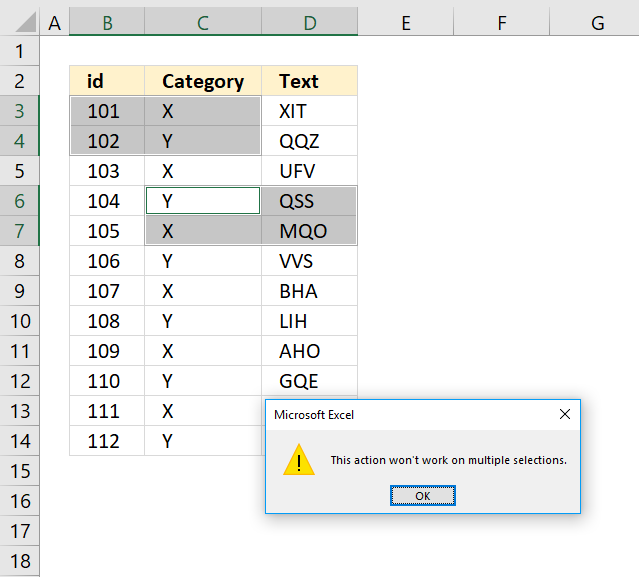
If you try to copy multiple cell ranges on a worksheet that don't have the same number of rows or columns you get the following error message.
This action won't work on multiple selections, see picture above. What? The cell ranges above have the exact same size?
 Yes, however, they also need to be on the same columns or rows.
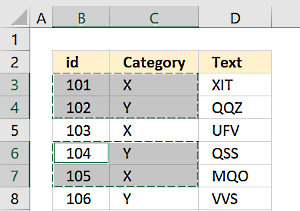
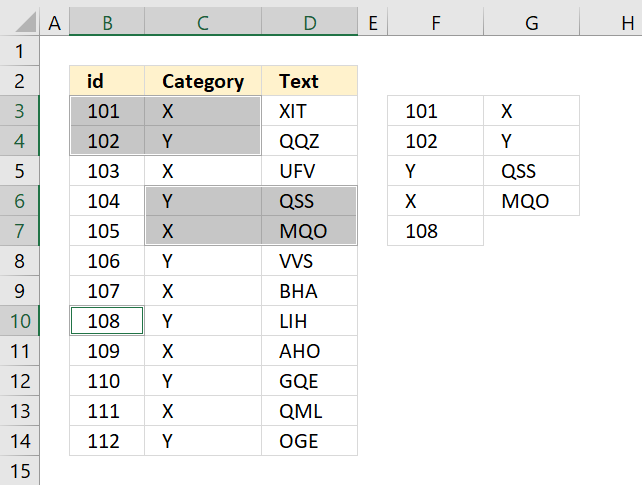
The image to the right shows selections that share the same column letters, in this example column B and C.
If the selected cell ranges share the same column letters your selected cell ranges may have a different number of rows.
What do you mean? The following picture shows multiple selections that share the same column letters but each selection has a different number of rows.
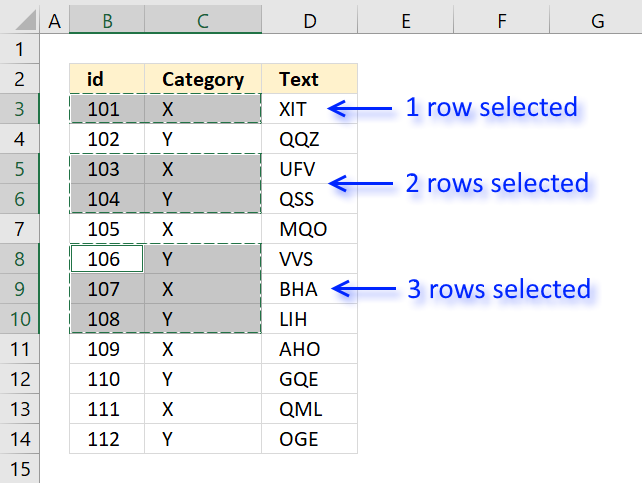
The picture above shows three selections, the first selection contains one row, the second contains two rows and the third selection has 3 rows.
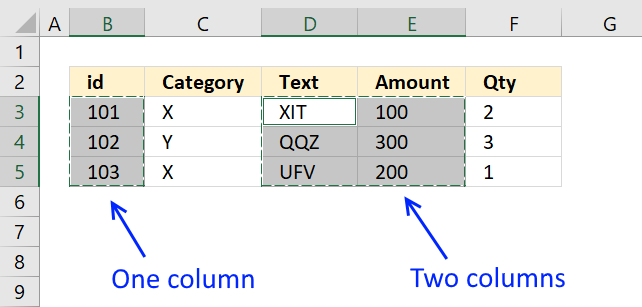
The same thing applies to cell ranges that share the same row numbers.
To sum it up, remember that the selections must share the same column letters or row numbers to be able to copy non contiguous cell ranges.
I need to copy multiple noncontiguous cell ranges that don't share the same column letters or row numbers? The following macro allows you to do that.
Copy non-contiguous cell ranges (Macro)
The picture above demonstrates a macro that allows you to copy non contiguous cell ranges. In this example, the selections are copied to destination cell F3.
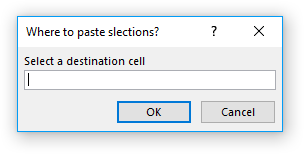
The macro will show you a dialog box that allows you to select a destination cell. Each selection is then copied to the destination cell or the first empty cell below.
Visual Basic Macro
Sub CopySelections()
Set cellranges = Application.Selection
Set ThisRng = Application.InputBox("Select a destination cell", "Where to paste slections?", Type:=8)
For Each cellrange In cellranges.Areas
    cellrange.Copy ThisRng.Offset(i)
    i = i + cellrange.Rows.CountLarge
Next cellrange
End Sub
Where to put the code?
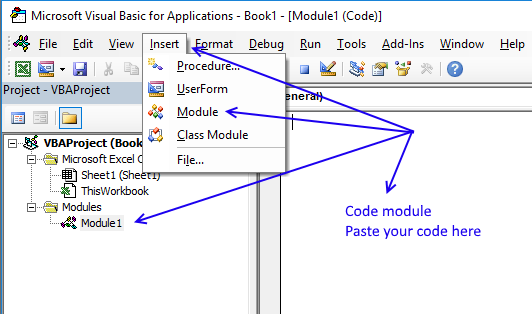
- Open the Visual Basic Editor (Alt + F11).
- Press with left mouse button on "Insert" on the top menu bar.
- Press with left mouse button on "Module" to insert a code module to your workbook. Module1 automatically appears in the VB Project window.
- Paste the code into the code module.
- Save your workbook as a macro-enabled workbook, the file extension looks like this: *.xlsm
- Exit Visual Basic Editor.
How to use the macro
- You simply hold CTRL key while selecting the cell ranges.
- Then press Alt+F8 to see a list of macros.
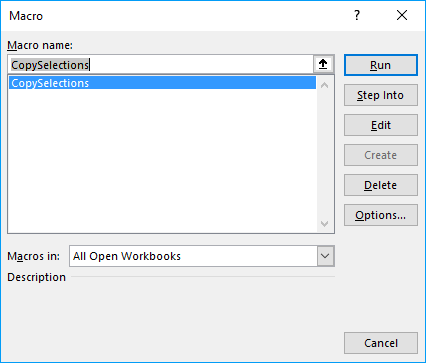
- Select CopySelections.
- Press with left mouse button on "Run" button
- A dialog box appears asking you for the destination cell.
That is it, the selections are copied to your destination cell.
Get Excel *.xlsm file
How to copy non contiguous cell ranges.xlsm
2. How to copy every n-th row from a list

This article demonstrates a formula and a VBA macro that returns every n-th row from a given cell range. The image above shows a list in cell range B2:F12 and a formula in cell range H3:L7 extracting every other row from cell range B3:F12.
The following link takes you to an article that explains how to copy rows matching a condition: Extract multiple records based on a condition
Formula in cell H3:
The SEQUENCE function was introduced in January 2020 and is available to Excel 365 subscribers. It generates a series of numbers based on the rows, columns, start and step arguments. The columns, start and step arguments are optional.
SEQUENCE(rows,[columns],[start],[step])
I will now describe another formula below for older Excel versions.
Formula in cell H3:
This formula is smaller, however, you need to copy cell H3 and paste to adjacent cells as far as needed both horizontally and vertically. This is not necessary with the first formula above as it expands automatically, this behavior by the formula is called spilling and is a feature for Excel 365 subscribers.
Explaining formula for older versions in cell H3
The steps below describe how to get every other row, however, I will also explain below what to change in order to get every nth row.
Step 1 - INDEX function
The INDEX function lets you fetch a given value, it requires a row number and a column number in order to return a specific value from a given cell range.
The row and column arguments allow you to specify which value to get from the cell range.
INDEX(cell_ref, [row], [col])
Step 2 - Calculate row number
To get every nth row we need to create a formula that returns a number series based on a step value. The ROWS function returns a number which represents the number of rows a cell range contains.
The cell reference $A$1:A1 expands when you copy cell H3 and paste to cells below, the first part is an absolute cell reference $A$1 which means it is locked to cell A1.
The second part A1 is a relative cell reference. It changes when the cell is copied to cells below as far as needed.
ROWS($A$1:A1)*2-1
becomes
1*2-1
and returns 1.
Step 3 - Calculate column number
The COLUMNs function returns the number of columns in a cell range. The arumnet contains a cell range that expands as well when the cell is copied to cells below.
COLUMNS($A$1:A1))
returns 1.
Step 4 - Return value

INDEX($B$3:$F$12,ROWS($A$1:A1)*2-1,COLUMNS($A$1:A1))
becomes
INDEX($B$3:$F$12,1,1)
becomes
$B$3
and returns 1 in cell H3.
What to change in formulas if I want every nth row?
Excel 365 formula:
The first argument in the SEQUENCE function specifies the number of values the number series will contain. The last argument is the step value to use.
SEQUENCE(5, , , 2)
returns {1; 3; 5; 7; 9}
If you want every fifth row and a total of twenty rows then the SEQUENCE function becomes:
SEQUENCE(20, , , 5)
returns {1; 6; 11; 16; 21; 26; 31; 36; 41; 46; 51; 56; 61; 66; 71; 76; 81; 86; 91; 96}
You can also specify which number to start with.
SEQUENCE(20, ,2 , 5)
returns
{2; 7; 12; 17; 22; 27; 32; 37; 42; 47; 52; 57; 62; 67; 72; 77; 82; 87; 92; 97}
Formula for all Excel versions:
You want to change the bolded numbers in the above formula to get every nth value.
n-(n-1)
Example 1, to get every fourth number change 2-1 to 4-3.
Example 2, to fetch every 7th row change 2-1 to 7-6.
Copy every nth row - VBA macro

The image above shows the macro displaying an inputbox asking the Excel user for a step value.
Sub CopyNthRow()

'Ask for step number
sn = CInt(Application.InputBox("Enter step number", , , , , , , 1))

'Row number to start with
st = CInt(Application.InputBox("Enter starting row number", , , , , , , 1))

'Ask for cell range
Set Rng = Application.InputBox(Prompt:="Select cell range:", _
Title:="Copy every nth rows", _
Default:=Selection.Address, Type:=8)

'Create new worksheet
Set Ws = Sheets.Add

'Save number 1 to variable r
r = 1

'Save number of rows in cell range
co = CInt(Rng.Rows.CountLarge)

'Copy rows based on step number
For i = st To CInt(co) Step sn

    'Paste to new worksheet
    Rng.Rows(i).Copy Ws.Range("A" & r)

    'Add 1 to r
    r = r + 1

'Continue with next number based on variable i
Next i

End Sub
Where to put the code?

- Press Alt + F11 to open the Visual Basic Editor.
- Press with left mouse button on "Insert" on the top menu, see image above.
- Press with left mouse button on "Module". A module named Module1 appears in the Project Explorer, see image above.
- Paste code to window.
- Return to Excel.
How to run macro?

- Press Alt + F8 to open the Macro dialog box.
- Press with mouse on the macro name, in this case CopyNthRow.
- Press with left mouse button on "Run" button.
What happens when you run the macro?
The macro asks the user for a step number (n), a start row number, and a cell range to use. It will now copy every nth row from the supplied cell range to a new worksheet.
Macro category

Table of Contents Excel monthly calendar - VBA Calendar Drop down lists Headers Calculating dates (formula) Conditional formatting Today Dates […]
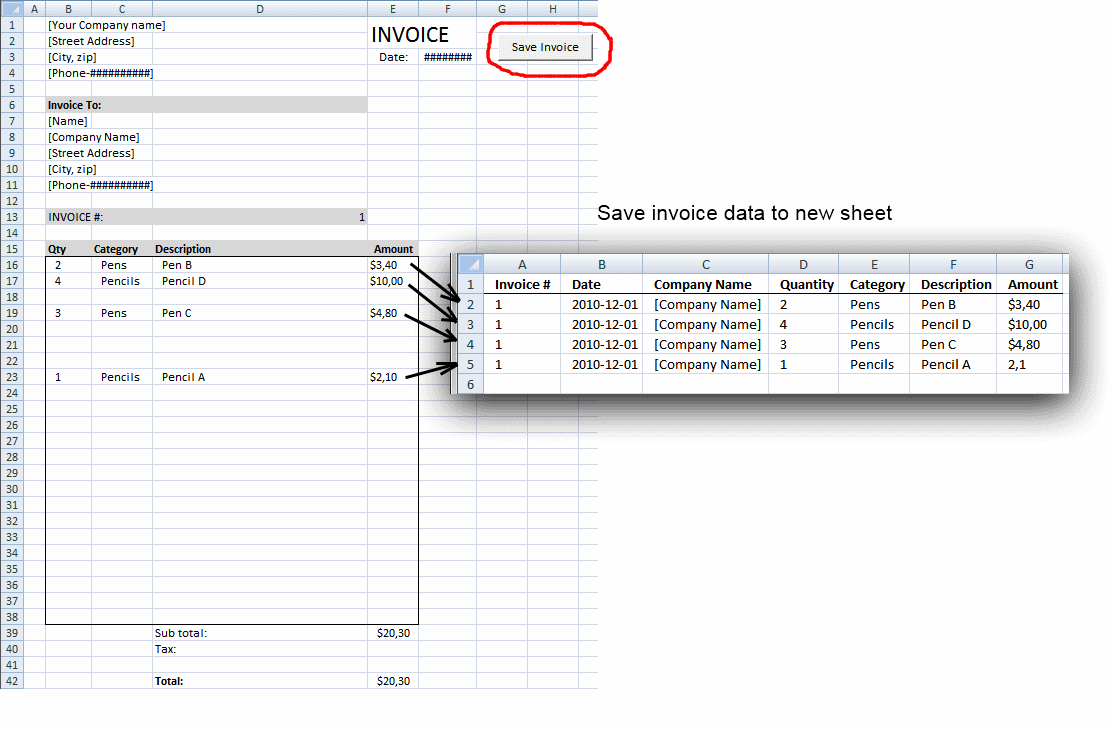
Table of contents Save invoice data - VBA Invoice template with dependent drop down lists Select and view invoice - […]
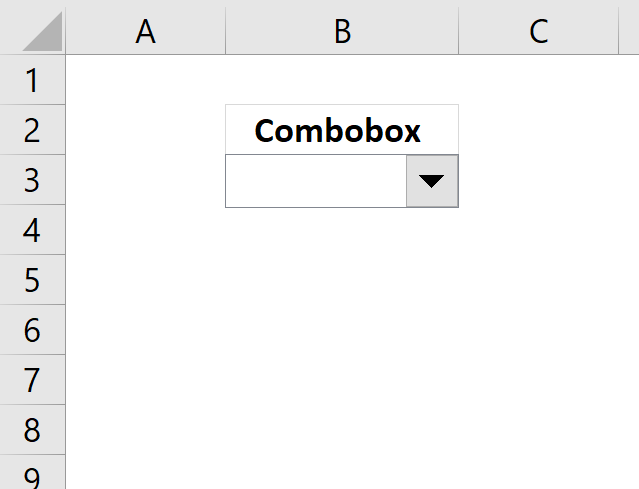
This blog post demonstrates how to create, populate and change comboboxes (form control) programmatically. Form controls are not as flexible […]
Vba category
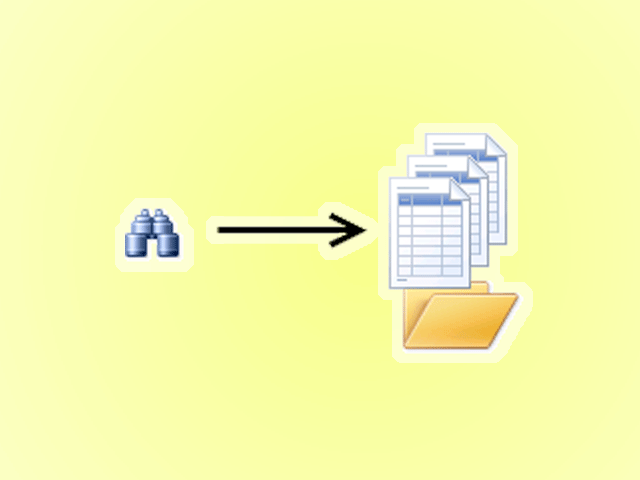
Today I'll show you how to search all Excel workbooks with file extensions xls, xlsx and xlsm in a given folder for a […]
Table of Contents Excel monthly calendar - VBA Calendar Drop down lists Headers Calculating dates (formula) Conditional formatting Today Dates […]
Table of contents Save invoice data - VBA Invoice template with dependent drop down lists Select and view invoice - […]
Excel categories
2 Responses to “How to copy non contiguous cell ranges”
Leave a Reply
How to comment
How to add a formula to your comment
<code>Insert your formula here.</code>
Convert less than and larger than signs
Use html character entities instead of less than and larger than signs.
< becomes < and > becomes >
How to add VBA code to your comment
[vb 1="vbnet" language=","]
Put your VBA code here.
[/vb]
How to add a picture to your comment:
Upload picture to postimage.org or imgur
Paste image link to your comment.
Hi Oscar,
VBA is new to me and I was looking for a code to copy non contiguous cells in one row on another tab and this seems to do the job very well. However I still have two issues which I have troubles to solve:
- can it be that if the amount of cells I try to select is too large, I get a stack overflow? is there a way to select the first half and to 'hold on' and select the second half?
- some of the cells that i want to copy contain summations of other cells, when copied the formula is shown instead of the number. Where in the code should I add the paste special?
Thanks a lot for taking the time to review this question!
VBA dummie,
- can it be that if the amount of cells I try to select is too large, I get a stack overflow? is there a way to select the first half and to 'hold on' and select the second half?
I am guessing here, perhaps the macro is repeating forever? Are you using event code?
- some of the cells that i want to copy contain summations of other cells, when copied the formula is shown instead of the number. Where in the code should I add the paste special?
This article shows you how to copy values and not cell formulas:
https://www.get-digital-help.com/2012/01/24/copy-a-cell-range-whose-size-is-likely-to-change-from-time-to-time-vba/