Show / hide a picture using a button

This article explains how to hide a specific image in Excel using a shape as a button. If the user press with left mouse button ons the shape the image disappears, press with left mouse button on again and it is visible. The shape is
What's on this page
- Introduction
- Insert a shape
- Insert an image
- Show/Hide an image using a VBA macro
- Where to put the code?
- Link macro to shape
- Place image next to the upper-right corner of shape
- Place image next to the upper-left corner of shape
- Place image next to the lower-left corner of shape
- Get Excel *.xlsm file
- How to change a picture in a worksheet dynamically - VBA
1. Introduction
What is a shape?
A Shape in Excel refers to graphical objects such as: Basic Shapes (rectangles, circles, arrows, etc.), lines and connectors, text Boxes, pictures, charts, SmartArt Graphics. Shapes can be used for visual representation, annotations, or interactive dashboards.
You can create and manipulate shapes in Excel using VBA (Visual Basic for Applications). The Shapes.AddShape method allows you to insert various types of shapes. I will show you how to insert shapes here but not how to programmatically insert shapes, that will be another article.
What is a macro?
Macros are sequences of instructions or actions that can be recorded and replayed in Excel to automate repetitive tasks.
- Automate tasks such as formatting, calculations, data manipulation, or interacting with other workbooks.
- You can record macros using the built-in Excel Macro Recorder, which generates VBA (Visual Basic for Applications) code for the actions you perform in Excel.
- Alternatively, you can write macros manually in the VBA editor for more control and flexibility.
- Macros can be run from the Developer tab, assigned to a button, or triggered through custom VBA code.
What is VBA?
VBA (Visual Basic for Applications) is a programming language developed by Microsoft that is used for automating tasks in Microsoft Office applications such as Excel, Word, and Access. It allows users to create macros, automate repetitive tasks, and enhance Office functionality with custom scripts.
How to enable developer tab?
Here is how to enable the "Developer" tab if it is missing on the ribbon:
- Press with left mouse button on "File" located above the ribbon, a new pane appears.
- Press with mouse on the "Options" button to access Excel settings.
- Press with mouse on "Customize Ribbon" and then on the right side press with left mouse button on the checkbox next to the tab "Developer" to enable it.
- Press with left mouse button on "OK" button to apply changes.
The "Developer" tab is now visible on the ribbon. Here are instructions for Excel 2007, Excel 2010 and Excel 2013
Demonstration - How does this work?
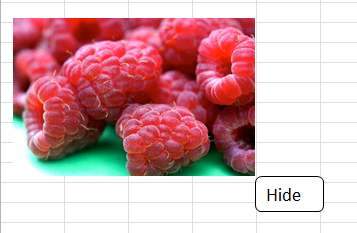
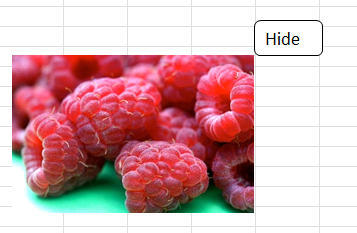
The following animated image shows when you press with left mouse button on the shape, the picture is hidden. Press with left mouse button on it again and the picture shows up. The macro changes the shape text based on the state of the image.
Move and press with left mouse button on the shape and the picture is automatically re-positioned to the lower right shape corner. You can also position the picture wherever you like, I'll show later in this post how to accomplish that.
Instructions
First, let's create a button (shape). This time I will not use a regular button (Form Controls), I will use a shape. I chose a shape with rounded corners.
2. Insert a shape

- Go to tab "Insert" on the ribbon.
- Press with left mouse button on "Shapes" button located on the ribbon. A pop-up menu appears, see image above.
- Press with mouse on a shape to select it. I chose a rounded rectangle.
- Press and hold with left mouse button on the worksheet. Drag with mouse to place and create the shape.

The image above shows a new shape. The round white circles around the shape are sizing handles.
The sizing handles indicate that the shape is selected. To select a shape simply press with left mouse button on with left mouse button on a shape and the sizing handles appear.
Press with left mouse button on anywhere outside the shape to deselect it. To move a shape press and hold with left mouse button on it and then drag with mouse to the new location.
Press and hold with left mouse button on a sizing handle, then drag with mouse to resize the shape.
Press and hold Alt key to align shape with cell grid while moving or resizing the shape.
3. Insert a picture
- Copy a picture.
- Paste a picture to a worksheet.
- Select the picture to see the name. The name appears in the name bar, see image below.
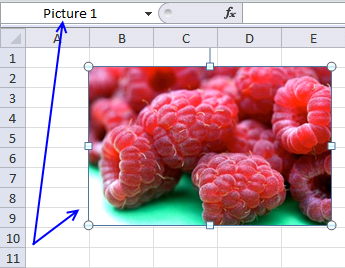
Note, you change the name of the shape using the name bar. Press with left mouse button on the text in the name bar, edit the text then press Enter.
4. VBA Code
'Name macro
Sub Macro1()

'The With ... End With statement allows you to write shorter code by referring to an object only once instead of using it with each property.
With ActiveSheet.Shapes("Rounded Rectangle 4").TextFrame2.TextRange.Characters

   'Check if shape text is equal to "Hide"
   If .Text = "Hide" Then

      'Change shape text to "Show"
      .Text = "Show"

      'Hide shape
      ActiveSheet.Shapes("Picture 1").Visible = False

   'Continue here if shape is not equal to "Hide"
   Else

      'Change text to "Hide"
      .Text = "Hide"

      'The With ... End With statement allows you to write shorter code by referring to an object only once instead of using it with each property.
      With ActiveSheet.Shapes("Rounded Rectangle 4")

         'Move image named "Picture1" based to lower right corner of shape
         ActiveSheet.Shapes("Picture 1").Left = .Left + .Width
         ActiveSheet.Shapes("Picture 1").Top = .Top + .Height

         'Show image
         ActiveSheet.Shapes("Picture 1").Visible = True
      End With
    End If
End With
End Sub
5. Where to put the code?
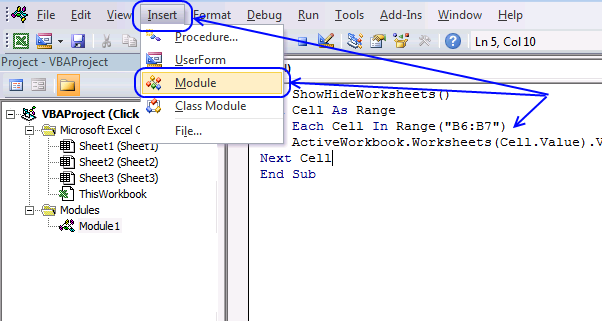
- Press Alt + F11 to start the Visual Basic Editor (VBE).
- Press with left mouse button on "Insert" on the menu, see image above.
- Press with left mouse button on "Module".
- Paste VBA code to window.
- Exit VB Editor and return to Excel.
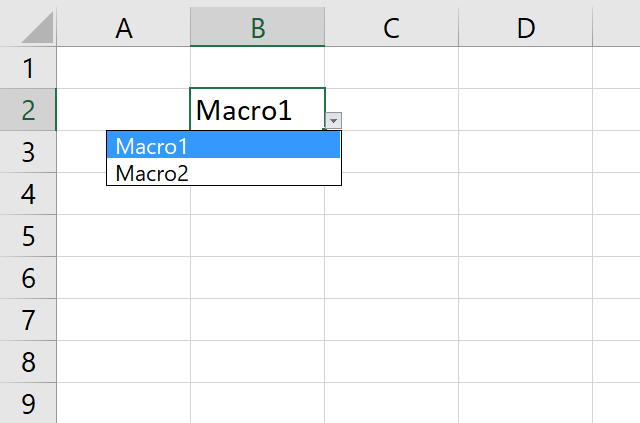
6. How to assign a macro to shape

- Press with right mouse button on on the shape. A pop-up menu appears.
- Press with left mouse button on "Assign Macro...", see image above. A dialog box shows up.
- Select Macro1 in the list.

- Press with left mouse button on OK button to assign Macro1 to the shape.
Positioning the picture
The following examples demonstrate how to place a picture in relation to a shape using VBA.
6. Place image next to the upper right corner of a shape

These VBA lines change the position of the image to the upper right corner of the shape. The picture name is "Picture 1" and the last line below makes it visible.
'The With ... End With statement allows you to write shorter code by referring to an object only once instead of using it with each property.
With ActiveSheet.Shapes("Rounded Rectangle 4")

'Place image next to the upper right corner
ActiveSheet.Shapes("Picture 1").Left = .Left + .Width
ActiveSheet.Shapes("Picture 1").Top = .Top - ActiveSheet.Shapes("Picture 1").Height

'Show image
ActiveSheet.Shapes("Picture 1").Visible = True
End With
7. Place image next to the upper left corner of a shape
'The With ... End With statement allows you to write shorter code by referring to an object only once instead of using it with each property.
With ActiveSheet.Shapes("Rounded Rectangle 4")

'Place image next to the upper left corner
ActiveSheet.Shapes("Picture 1").Left = .Left - ActiveSheet.Shapes("Picture 1").Width
ActiveSheet.Shapes("Picture 1").Top = .Top - ActiveSheet.Shapes("Picture 1").Height

'Show image
ActiveSheet.Shapes("Picture 1").Visible = True
End With
8. Place image next to the lower left corner of a shape
'The With ... End With statement allows you to write shorter code by referring to an object only once instead of using it with each property.
With ActiveSheet.Shapes("Rounded Rectangle 4")

'Place image next to the lower left corner
ActiveSheet.Shapes("Picture 1").Left = .Left - ActiveSheet.Shapes("Picture 1").Width
ActiveSheet.Shapes("Picture 1").Top = .Top + .Height

'Show image
ActiveSheet.Shapes("Picture 1").Visible = True
End With
9. Get Excel File
Recommended links
- VBA Code to insert, move, delete and control pictures
- Show Picture on Mouse Hover with VBA
- Showing a picture from a list of pictures
10. How to change a picture in a worksheet dynamically - VBA

Rahul asks:
I want to know how to create a vlookup sheet, and when we enter a name in a cell Excel shows all the details and a photo.
The formula in cell C4 uses the value in cell C2 to lookup the correct region specified in the "Data" worksheet. You can easily add more details using this approach for example in cell D4.
Formula in cell C4:
The MATCH function looks for a matching value in cell range A2:A9 in worksheet Data using condition specified in cell C2 located on worksheet "Lookup".
MATCH(C2,Data!A2:A9,0)
becomes
MATCH("Giraffe", {"Giraffe"; ... ; "Cheetah"}, 0) returns 1. The value "Giraffe" is the first value in the array.
The third argument is 0 (zero) meaning there must be an exact match or the function returns an error.
The INDEX function returns a value from cell range B2:B9 in worksheet Data using a row argument which we calculated in the previous step.
INDEX(Data!B2:B9,MATCH(C2,Data!A2:A9,0)) returns "Africa" in cell C4.
The following formula in cell C6 extracts the corresponding file path and file name, however, the value is hidden with the use of cell formatting.
Formula in cell C6:
I have hidden the contents in cell C6.
- Select cell C6.
- Press Ctrl + 1 to open the cell formatting dialog box.
- Press with left mouse button on Custom
- Type ;;;
- Press with left mouse button on OK button.
Data sheet
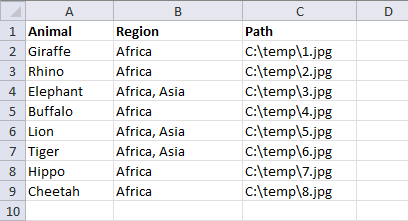
The Data worksheet contains the item names in column A, the details in column B and the file name and file path in column C.
VBA code
'Event code
Private Sub Worksheet_Change(ByVal Target As Range)

'Check if cell C2 has been changed
If Target.Address = "$C$2" Then

    'Delete the previous image
    Shapes(1).Delete

    'Insert and select image specified in cell C6
    Pictures.Insert(ActiveSheet.Range("C6").Value).Select

    'The With ... End With statement allows you to write shorter code by referring to an object only once instead of using it with each property.
    With Selection

        'Change image height to 120.24 points
        .Height = 120.24

        'Change image width to 180 points
        .Width = 180

        'Position image 96.75 points from left border of Excel worksheet
        .Left = 96.75

        'Position image 90 points from top border of Excel worksheet
        .Top = 90
    End With

    'Select cell C3 of active worksheet
    Range("C3").Select
End If
End Sub
The VBA code above is event code meaning it is rund if a cell value changes. Event code is put in a worksheet or a workbook module and not in a regular module, there are detailed instructions below on where to put the code.
The VBA code above is not going to work great if you have other shapes or images placed in the same worksheet.
The following line deletes the first image in the active worksheet and if you have more images the code may delete one of those images which is not ideal.
Shapes(1).Delete
The workaround is to save the image name to another cell which is then used to remove the old image next time the code is rund. This prevents multiple images being inserted on top of each other and keeps the workbook size smaller.
If there is no value in cell D6 the code will error out, to prevent that from happening I have enabled error handling while image being deleted.
'Event code
Private Sub Worksheet_Change(ByVal Target As Range)

'Check if cell C2 has been changed
If Target.Address = "$C$2" Then

    'Enable error handling
    On Error Resume Next

       'Delete image using the name saved in cell D6
       ActiveSheet.Shapes(Range("D6")).Delete

    'Disable error handling
    On Error GoTo 0

    'Insert and select image specified in cell C6
    ActiveSheet.Pictures.Insert(ActiveSheet.Range("C6").Value).Select

    'The With ... End With statement allows you to write shorter code by referring to an object only once instead of using it with each property.
    With Selection

        'Change image height to 120.24 points
        .Height = 120.24

        'Change image width to 180 points
        .Width = 180

        'Position image 96.75 points from left border of Excel worksheet
        .Left = 96.75

        'Position image 90 points from top border of Excel worksheet
        .Top = 90

        'Save image name to cell D6
        Range("D6") = .Name
    End With

    'Select cell C3
    Range("C3").Select
End If
End Sub
Make sure you apply cell formatting to cell D6 as well.
Where to put the VBA event code?

- Press with right mouse button on on the worksheet name.
- Press with left mouse button on "View Code".

- Paste code below to sheet module.
- Exit VB editor.
Animated image
If then else statement category

Table of Contents Excel monthly calendar - VBA Calendar Drop down lists Headers Calculating dates (formula) Conditional formatting Today Dates […]
This article demonstrates how to run a VBA macro using a Drop Down list. The Drop Down list contains two […]
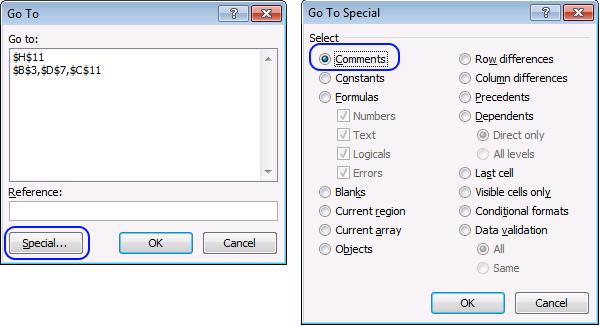
Did you know that you can select all cells containing comments in the current sheet? Press F5, press with left […]
Macro category
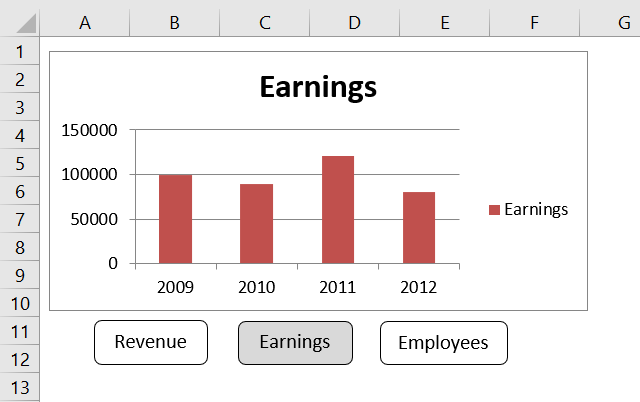
Table of Contents How to create an interactive Excel chart How to filter chart data How to build an interactive […]
Table of Contents Excel monthly calendar - VBA Calendar Drop down lists Headers Calculating dates (formula) Conditional formatting Today Dates […]
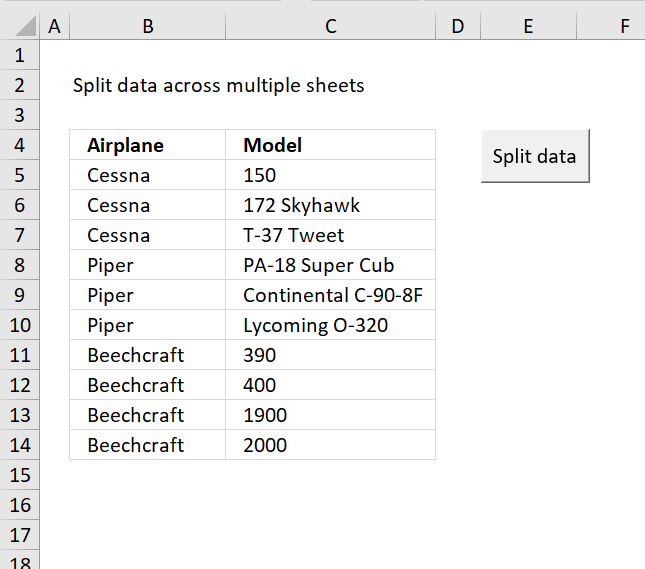
Table of Contents Split data across multiple sheets - VBA Add values to worksheets based on a condition - VBA […]
Excel categories
35 Responses to “Show / hide a picture using a button”
Leave a Reply
How to comment
How to add a formula to your comment
<code>Insert your formula here.</code>
Convert less than and larger than signs
Use html character entities instead of less than and larger than signs.
< becomes < and > becomes >
How to add VBA code to your comment
[vb 1="vbnet" language=","]
Put your VBA code here.
[/vb]
How to add a picture to your comment:
Upload picture to postimage.org or imgur
Paste image link to your comment.
Oscar,
Concerning Change Picture VBA, I wasn't able to get this to run. Code stops at Shapes(1).Delete with Run-time error '-2147024809(80070057)': The index into the specified collection is out of bounds. I'm using Office 2013. There was some blog chatter about inserting image working in 2010 but not on 2007. Didn't find anything directly related to 2013. Do you know of a problem with this code and 2013 or should I keep digging myself?
Thanks and regards,
I ended up making the value of "C6" a hyperlink. Pressing with left mouse button on the link (which brought up the image in my browser). Then removing the link and selecting another image via "C2". Now it's working the way it should. Strange...
Leroy Jones,
I have not yet upgraded to the 2013 version. I want the Power pivot functionality.
I ended up making the value of "C6" a hyperlink. Pressing with left mouse button on the link (which brought up the image in my browser). Then removing the link and selecting another image via "C2". Now it's working the way it should. Strange...
Yes, strange. Thanks for sharing your solution.
how did you apply the picture path .. i am unable to connect .. please let me know hot to connect picture to excel file
Lokesh,
I added the picture paths to column C, data sheet.
Yes... column C data sheet, but how did you connect link to Column C with picture paths ... Where do you save the pictures ? Please advise to me . thanks.
Lokesh,
Where do you save the pictures ?
I save the pictures in the same path mentioned in column C.
For example, if picture path is C:\temp\1.jpg I save 1.jpg in folder C:\temp.
Hello Oscar,
I got the same problem with Leroy Jones. Code stops at Shapes(1).Delete with Run-time error(80070057).The picture can not show in the column C6, Is it because the picture paths are not connected? Please help.
Thanks and regards
Muzaffer,
I think it stops there because there is no picture to delete. Try this:
Private Sub Worksheet_Change(ByVal Target As Range) If Target.Address = "$C$2" Then On error resume next Shapes(1).Delete On error goto 0 Pictures.Insert(ActiveSheet.Range("C6").Value).Select With Selection .Height = 120.24 .Width = 180 .Left = 96.75 .Top = 90 End With Range("C3").Select End If End SubHello Mr. Oscar i like this your project and was trying to test it i did all in a same worksheet with adaptations needed in formulas the only thing that is not working is the vba code, it gives me the following error in this line --> "Pictures.Insert(ActiveSheet.Range("C6").Value).Select" telling "Run time error "1004" "is not possible to obtain the property insert of the class pictures". I really would like to get this work, please could you help? Maybe send me one working? Thanks.
Hello Oscar,
Thanks for your reply. I've tried with your new code, now there was no error pop-up,but still can not show picture in the column C6,only the text is shown(the picture path in the data sheet). Do I need to insert one picture first to the colum C6? And how to make it connect to the path in data sheet? Please help me because I really need to do something exactly like your project.
Thanks and regards
Fernandes and Muzaffer
I have attached a zip file to this post.
Vlookup-pictures.zip
Thank you so much for your help Oscar, it works perfectly now.
Thank you for your kindness and availability Oscar, its works fine!
Wonderful work
Is it possible to make the code to run on Office 2003
Boa noite Oscar, sou um grande apreciador de seu sitio.
É a primeira vez que comento, e tenho muito a agradecer por nos ajudar a resolver alguns de nossas dificuldades. e a minha dentre muitas é como visualizar uma imagem em pdf, eu inseri um objeto, porem gostaria de visualizar no mesmo processo em que visualizamos as imagem pelo procv como demonstrou na sua ultima postagem
Hello, Thank you so much for this. It worked on my original worksheet, but once that sheet is copied, the macro no longer works because the new sheet has new shape names. Is there a way workaround for this? Like a way to make Excel not change the shape names when copied? I can't seem to find anything. Thanks again, this is the most useful tutorial so far that I've found on this. I'm a beginner, so I'm sure that many of the things I need to know are standard knowledge for most.
i think you can name the picture so that the name stays the same (formulas tab -> define name.
hi,
i try this, it's working good. but i have two photos, when i press the button any one picture has to be shown and another one is to be hide is that possible.if it is possible pls tell that how to do.
regards
rahul.
Hello,
I just wanted to know how can I retrieve an image from the desktop without selecting a range
for example:
I have created a macro and added a button in the ribbon, so what I wanted is that when i press with the left mouse button on that macro it should give a pop-up asking a name, after inserting the name it should pop-up image.
can anyone please help?
Thanks,
karteek
[…] https://www.get-digital-help.com/show-and-hide-a-picture-vba/ […]
how to make it at bottom and center?
azmi,
With ActiveSheet.Shapes("Rounded Rectangle 4") ActiveSheet.Shapes("Picture 1").Left = .Left + .Width / 2 - ActiveSheet.Shapes("Picture 1").Width / 2 ActiveSheet.Shapes("Picture 1").Top = .Top + .Height ActiveSheet.Shapes("Picture 1").Visible = True End WithChange picture (vba) video tutorial link......please please please
I need very argent this…
Change picture (vba) video tutorial link......please please please
I need very argent this…
Your code can't understand no work my execl sheet
1. have your video tutorials channel.....
2. change picture vba video tutorials plz
how can i apply the vbacode to multiple buttons? like show/hide1 button show&hides only picture 1, then show/hide2 shows&hides only picture 2?
Micaela
Assign Macro1 to the first button and Macro2 to the second button. Make sure the button and picture names are correct.
Sub Macro1() With ActiveSheet.Shapes("Rounded Rectangle 1").TextFrame2.TextRange.Characters If .Text = "Hide" Then .Text = "Show" ActiveSheet.Shapes("Picture 1").Visible = False Else .Text = "Hide" With ActiveSheet.Shapes("Rounded Rectangle 1") ActiveSheet.Shapes("Picture 1").Left = .Left + .Width ActiveSheet.Shapes("Picture 1").Top = .Top + .Height ActiveSheet.Shapes("Picture 1").Visible = True End With End If End With End Sub Sub Macro2() With ActiveSheet.Shapes("Rounded Rectangle 2").TextFrame2.TextRange.Characters If .Text = "Hide" Then .Text = "Show" ActiveSheet.Shapes("Picture 2").Visible = False Else .Text = "Hide" With ActiveSheet.Shapes("Rounded Rectangle 2") ActiveSheet.Shapes("Picture 2").Left = .Left + .Width ActiveSheet.Shapes("Picture 2").Top = .Top + .Height ActiveSheet.Shapes("Picture 2").Visible = True End With End If End With End SubSir I have a worksheet in that sheet several columns have txt "medical" heading g with other text in row1 but I want to index 2 row same column data in the columns contain text medical completely. Plz give me an array formula.
I need to display some pictures in every cell of a column or other different cell. If i use insert picture, the file becomes huge in size and it becomes extremely laggy. Could you please help me by giving the VBA code to display picture in a cell which picture is actually stored in a different location/folder?
Sub Macro1()
With ActiveSheet.Shapes("Rounded Rectangle 1").TextFrame2.TextRange.Characters
If .Text = "Hide" Then
.Text = "Show"
ActiveSheet.Shapes("Picture 1").Visible = False
Else
.Text = "Hide"
With ActiveSheet.Shapes("Rounded Rectangle 1")
ActiveSheet.Shapes("Picture 1").Left = .Left + .Width
ActiveSheet.Shapes("Picture 1").Top = .Top + .Height
ActiveSheet.Shapes("Picture 1").Visible = True
End With
End If
End With
End Sub
Sub Macro2()
With ActiveSheet.Shapes("Rounded Rectangle 2").TextFrame2.TextRange.Characters
If .Text = "Hide" Then
.Text = "Show"
ActiveSheet.Shapes("Picture 2").Visible = False
Else
.Text = "Hide"
With ActiveSheet.Shapes("Rounded Rectangle 2")
ActiveSheet.Shapes("Picture 2").Left = .Left + .Width
ActiveSheet.Shapes("Picture 2").Top = .Top + .Height
ActiveSheet.Shapes("Picture 2").Visible = True
End With
End If
End With
End Sub
Dear sir, this code perfectly working for me if i work on sheet1 in the workbook. if i move to second worksheet code is not running it is showing some error. Also it is not working in sheet1 also. after deleting the sheet2 and macro for the corresponding sheet then it starting resuming to work Perfectly again in sheet.
Replace all instances of ActiveSheet to Worksheets("Sheet1")
Sheet1 is the name of your worksheet, they must correspond to the worksheet names in your workbook.
For example:
ActiveSheet.Shapes("Picture 2").Left = .Left + .Width
becomes
Worksheets("Sheet1").Shapes("Picture 2").Left = .Left + .WidthReplace all instances of ActiveSheet to Worksheets("Sheet1")
Thank you for this code it works perfect. I was wondering if there is a way to apply the macro to multiple buttons to show different pictures. For example, I have a large list of items with images for each one and want to create a button for each image. Is it possible to do this without having to create a macro for every single button/image? Thank you.
Yes, this small video demonstrates a macro that adds a button to the upper right corner of all images in the active worksheet.
Link to animation
Sub InsertRoundedRectangle()
    Dim ws As Worksheet
    Dim shp As Shape

    Set ws = ActiveSheet

    For Each shp In ws.Shapes

        If shp.Type = msoPicture Then

            Dim leftPos As Double
            Dim topPos As Double
            leftPos = shp.Left + shp.Width
            topPos = shp.Top

            Set shp = ws.Shapes.AddShape(msoShapeRoundedRectangle, leftPos, topPos - 25, 75, 25)

            With shp
                .TextFrame.Characters.Text = "Show"
                .TextFrame.Characters.Font.Size = 14
                .TextFrame.Characters.Font.Color = RGB(0, 0, 0)
                .TextFrame.Characters.Font.Bold = True
                .TextFrame.Characters.Font.Name = "Arial"
                .TextFrame.VerticalAlignment = xlCenter
                .TextFrame.HorizontalAlignment = xlCenter
                .Fill.ForeColor.RGB = RGB(255, 255, 255)
                .Line.ForeColor.RGB = RGB(0, 0, 0)
                .Line.Weight = 2
                .Adjustments.Item(1) = 0.5
            End With
        End If
    Next shp
End Sub